
How to Program a Garage Door Remote: LiftMaster, Chamberlain, Genie & Craftsman (Step by Step)
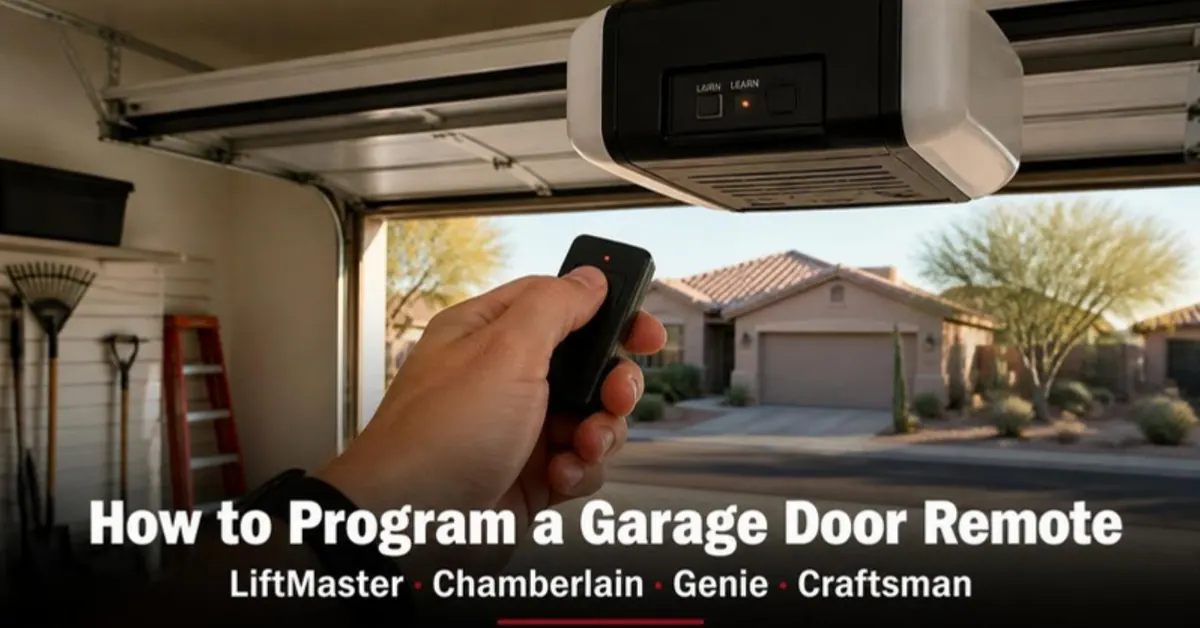
That's the whole job for most garage doors in Mesa, Gilbert, Chandler and across the Phoenix area. The details that change by brand are where the button is, what color it is, and how many times to press the remote. This guide covers each brand, plus your car's built-in button, keypads, universal remotes, and what to do when it refuses to pair.
Step 1: Find the LEARN Button and Note Its Color
Every modern opener has a programming button on the motor unit itself, the box on the ceiling. It's usually on the back or side, often under the light lens or behind a small panel. You'll need a step ladder. Take a photo of the button before you start; the color tells you which remotes will work with your opener, and it's the first thing we ask when someone calls about a remote that won't pair.
| Button | Brand & era | What it means for remotes |
|---|---|---|
| Yellow (round) | LiftMaster, Chamberlain, Craftsman, 2011 to today | Security+ 2.0. Any current LiftMaster/Chamberlain remote pairs with it. |
| Purple (round) | LiftMaster, Chamberlain, Craftsman, roughly 2005 to 2011 | Older Security+. Needs a purple-compatible remote (371LM, 372LM, 373LM, or a universal set to "purple"). |
| Red or orange (round) | LiftMaster, Chamberlain, Craftsman, late 1990s to mid-2000s | Older still. Universal remotes usually cover it; original remotes are getting scarce. |
| Red or blue "Program Set" button | Genie | Red = Intellicode (older). Blue = Intellicode II (2011 on). Newer Genie remotes work on both. |
| Green (square) | Linear and similar | Different family of remotes; a LiftMaster remote won't pair here. |
| No button, a row of tiny switches instead | Pre-1993 openers of any brand | Dip-switch coding, not a LEARN button. See the FAQ below, and read the safety note there. |
Can't find any button? Remove the light cover; on many Chamberlain and LiftMaster units it's directly behind it. On a Genie, feel along the side of the powerhead for a small recessed button.
LiftMaster & Chamberlain: How to Program the Remote
LiftMaster and Chamberlain are the same company (Chamberlain Group), so the steps are identical. Craftsman openers from the last 25 years are built by them too, so the same steps apply there (more on Craftsman below). The whole thing takes under a minute.
- Press and release the LEARN button. One quick press. The small LED next to it comes on and stays on for about 30 seconds. That's your window.
- Press and hold the remote button you want to use. Hold it until the opener's light flashes or you hear two clicks from the motor unit, then let go. That's the confirmation.
- Test it. Stand back at a normal distance and press the button. The door should run a full cycle.
- Adding a second remote? Press and release LEARN again and repeat. Each device gets its own press of the LEARN button; the window doesn't stay open for a queue.
- Programming a different button on the same remote for a second door? Walk to the other opener and do the same steps with that button. Each opener only knows what you teach it.
We cover LiftMaster in more depth, including why remotes fail in a hot garage, in our LiftMaster remote guide.
Genie: How to Program an Intellicode Remote
Genie does things slightly differently. Its programming button is labeled Program Set (sometimes "Learn Code"), and the opener usually wants the remote pressed twice, where LiftMaster wants once. Check the button color first: red means the original Intellicode, blue means Intellicode II. Current Genie remotes (the G3T and GM3T families) work with both.
- Press and release Program Set. Don't hold it. The indicator LED on the powerhead lights up (blue on newer units, red on older ones). You have about 30 seconds.
- Press the remote button once, pause a second, then press it again. On a blue-button Intellicode II, the purple or round LED flashes and goes out when it takes. On an older red-button unit, you may need a third press; the opener beeps or its light flashes to confirm.
- Test from a normal distance. Stand at least a few feet from the opener. If nothing happens after the first press, don't assume it failed; press once more and wait a moment before trying the sequence again.
- Repeat from step 1 for each additional remote.
Genie's Program Set button also handles the full reset and memory wipe, which is why it matters not to hold it.
Craftsman: Which Steps to Follow
Almost every Craftsman garage door opener sold since the mid-1990s was built by Chamberlain, so follow the LiftMaster/Chamberlain steps above, and the LEARN button color table applies exactly. A Craftsman remote and a Chamberlain remote of the same era are interchangeable. If your Craftsman has a yellow LEARN button, a current Chamberlain or LiftMaster remote will pair with it; if it's purple or red, buy a universal remote and set it to that color.
The exception is a very old Craftsman (early 1990s or before) with a row of small switches inside the remote and inside the opener. Those use dip-switch matching instead of a LEARN button: the switch positions inside the remote must mirror the ones inside the opener. If that's what you have, read the safety note in the FAQ before spending money on remotes.
Universal Remotes: One Extra Step First
A universal remote (Chamberlain's Clicker, LiftMaster's 374UT and 375UT, and the hardware-store brands) has to be told which opener family it's talking to before you go near the LEARN button. The step people skip is the setup; they press LEARN, press the remote, and nothing happens because the remote is still set to nothing.
- Set the remote to your opener's brand or LEARN button color. The method varies: some remotes have you hold a button until the LED blinks a certain color, others use a small switch or a sequence printed on the back. Match it to the color you photographed in step 1.
- Then program it like a normal remote: press and release LEARN on the opener, press the universal remote's button, wait for the flash or click.
- If it won't take, the brand setting is the first suspect, not the opener. Redo the setup step and try again.
Still stuck on a universal? Our page on universal remotes that won't pair walks through the setup for the common models.
Your Car's Built-In Buttons (HomeLink)
The buttons in your visor or mirror are a learning remote called HomeLink. Programming it is two jobs, and the order matters:
- Teach the car from a working handheld remote. Hold the handheld remote a few inches from the HomeLink button, then hold both the remote button and the car button until the car's indicator changes from slow blink to rapid blink. Now the car knows the signal.
- Teach the opener to trust the car. Press and release LEARN on the opener, go back to the car, and press the HomeLink button two or three times (pressing it once usually isn't enough; press, pause, press). The opener light flashes when it takes.
Newer cars, and Teslas in particular, have their own menus and quirks. We've written those up separately: HomeLink programming for most cars and Tesla HomeLink setup.
Outdoor Keypads
A wireless keypad pairs the same way, except you enter a PIN instead of pressing a remote button. On the current LiftMaster/Chamberlain keypad (the 877MAX/878MAX family): hold * and # together until the keypad's light stops blinking, enter your 4-digit PIN, press #, then press and release LEARN on the opener and, within 30 seconds, type the PIN on the keypad and press # (or the Enter arrow) once. The opener light flashes to confirm. Genie keypads use the Program Set button and a similar PIN-then-Enter sequence; the manual for your keypad model has the exact key order.
Keypad already programmed but acting up? That's usually the battery or sun damage to the buttons, covered in our keypad troubleshooting guide.
How to Erase All Remotes (and When You Should)
This is the step that happens by accident when someone holds the LEARN button, and the step you should do on purpose in three situations: you just moved into the house, a remote has been lost or stolen, or you can't account for every device that opens the door. Adding a new remote does nothing to the old ones; whoever holds a lost remote still has your door until you clear the memory.
- Gather every device first: all handheld remotes, the keypad, and every car with a HomeLink button. You'll be reprogramming all of them.
- LiftMaster, Chamberlain, Craftsman: press and hold the LEARN button until its LED goes out, about six seconds. Every remote, keypad and car button is now erased.
- Genie: press and hold Program Set until the indicator goes out completely, roughly six to ten seconds. All remotes and keypads are cleared. Aladdin Connect and the wall console keep their own pairing.
- Reprogram each device using the steps above for your brand.
Wi-Fi openers with myQ or Aladdin Connect keep their app pairing separately, so erasing remotes doesn't disconnect your phone. If it does, the app walks you through re-pairing.
Remote Won't Program? Six Things to Check
| Check | Why it stops the pairing | Fix |
|---|---|---|
| 1. Did you hold LEARN instead of pressing it? | A hold erases memory instead of opening the 30-second window. | Press and release, then watch for the LED to light. |
| 2. Fresh battery? | Pairing needs a stronger signal than daily use. A remote that works at close range can still be too weak to pair, and a lit indicator on the remote doesn't prove the battery is good. | Put in a battery from a sealed pack, not one from a drawer. |
| 3. Did the window expire? | About 30 seconds from the LEARN press. Climbing down the ladder to grab the remote uses most of it. | Have the remote in your hand before you press LEARN. |
| 4. Does the remote match the LEARN button color? | A yellow-button opener won't learn a purple-era remote, and a Genie won't learn a LiftMaster remote at all. Brand isn't enough; the security generation has to match. | Compare the remote's packaging to the color table above, or use a universal remote set to the right color. |
| 5. Is the opener's memory full? | Openers hold a fixed number of devices. A house that's been through several owners and a dozen remotes can be full without anyone knowing. | Erase all remotes (above) and reprogram what you actually use. |
| 6. Does the LEARN LED light at all? | If the opener has power and the LED never comes on, the button or the receiver board has failed. No remote will fix that. | This one is a service call. We can often fit an external receiver instead of replacing the opener. |
If the remote used to work and simply stopped, that's a different problem with its own checklist: garage door remote stopped working. And if the opener seems to be ignoring every remote you try, the deeper diagnosis is in opener won't learn a remote.
Two Arizona Notes
Batteries hate your garage. The coin cells and small 12-volt batteries in remotes lose capacity in heat, and a remote that spent the summer on a visor in a car parked outside in Mesa or Queen Creek has had a hard life. If a remote pairs but only works from the driveway, or stops after a few weeks, the battery is the first suspect every time. Keep one spare remote indoors as a known-good unit.
Monsoon storms wipe pairings. After a power surge it's common for every remote in the house to stop at once. They don't need replacing; they need reprogramming, which is exactly the steps on this page. A surge protector on the opener's outlet is cheap insurance for the receiver board, the one part that turns a programming job into a repair. If several devices died together after a storm, start with what to check after a monsoon surge.
Frequently Asked Questions
Can I program my own garage door remote?
Yes. On any opener made since the mid-1990s it takes a step ladder, the remote, and about a minute: press and release the LEARN (or Program Set) button on the motor unit, then press the remote button within 30 seconds. The only tools involved are your hands. The one thing to be careful of is holding the LEARN button down, which erases every remote the opener knows.
How do I reprogram my garage door clicker?
The same way you programmed it the first time. Reprogramming doesn't require erasing anything: press and release LEARN on the opener, press the clicker's button, wait for the opener light to flash. If it's a clicker that used to work and stopped, change the battery first; most "reprogramming" calls we get are really dead batteries.
How do I program a 4-button garage door remote?
Each button is programmed separately, and each one can control a different door or gate. Pick the button you want for a given door, press and release LEARN on that door's opener, then press that one button on the remote. Repeat with a different button at a different opener. The remote doesn't care which buttons you use or in what order.
How do I sync my garage remote to my car?
Your car's HomeLink buttons learn in two stages: first the car copies the signal from a working handheld remote (hold both buttons until the car's light blinks fast), then you press and release LEARN on the opener and press the car button two or three times until the opener light flashes. The second stage is the one people miss. Full walkthrough, including the newer cars with on-screen menus, is in our HomeLink guide linked above.
How do I program a garage door remote with no LEARN button?
If the opener has no LEARN button, it almost certainly predates 1993 and uses dip switches: a row of tiny switches inside the opener and inside the remote that have to be set to the same pattern. Open both, match the switch positions exactly, and the remote works. A safety note: openers that old predate the requirement for safety sensors that reverse the door if something is underneath it. Programming a remote for one is fine, but the opener itself is worth replacing for safety reasons, especially with kids or pets in the house.
Why won't my remote program after I changed the battery?
Three usual reasons. The new battery is weak (batteries from a drawer or an old blister pack often are), the battery is in backwards or not making contact with the spring clip, or the remote isn't the right generation for your opener and never was; the old battery just hid it by failing first. Check the battery with a fresh one from a sealed pack, then compare the remote to the LEARN button color table above.
Will a LiftMaster remote work on a Genie opener?
No. LiftMaster/Chamberlain (Security+) and Genie (Intellicode) are different rolling-code systems and don't talk to each other. If you want one remote for a LiftMaster door and a Genie door, use a universal remote, which can be set to a different brand on each button.
How many remotes can a garage door opener hold?
It depends on the model, but most residential openers store somewhere between a handful and a few dozen devices, counting remotes, keypads and car buttons together. If a remote refuses to pair on a house that's had several owners, a full memory is a real possibility. Erase all remotes and reprogram only the ones you use.

Would You Rather We Handled It?
We program remotes, keypads and car buttons as part of any opener visit, and we carry remotes for the common LEARN button colors on the truck. Licensed, insured, locally owned in Mesa, serving Gilbert, Chandler, Queen Creek and the Phoenix area. Quotes in writing before any work starts.